Game Progress Route in NieR: Automata has an unusually structured framework. This page will indicate the three different routes you can take for the three Major Endings. There are various routes in NieR: Automata that you can take while controlling various major characters. Even though they are not usually significant, the routes are different from one another. This page only contains an overview of the game's three main routes that will lead the player to reach the different endings of the game. For a detailed guide on fully completing the game, visit the Walkthrough page.
Game Progress Route in NieR: Automata
NieR Automata Route A
NieR Automata Chapters Navigation
Click to jump to a specific section of the page
Chapter 1
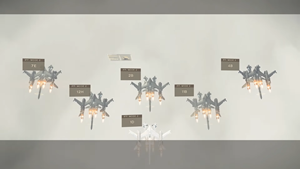
- Take down enemy Machines in the air using Flight Suit.
- Defeat the Buzzsaw Mini-Moss.
- Explore the Factory.
- Defeat two more Buzzsaw Mini-Bosses.
- Take on the Goliath Boss.
- Take on the Goliath Boss second Phase.
- Head to the Bunker.
The first part of the game involves a flight sequence where you have to shoot down other hostile vehicles. The intriguing aspect is that you can get the secret W ending right away in the game. Allow yourself to be struck and fly in the path of the laser to let the enemies destroy your flying machine. Following your demise, the game will confirm that you have seen the Broken Wings ending while also playing through the end credits at a faster pace. Every additional ending is automatically preserved, and its explanation will appear in the saves you make. The viewpoint will slightly alter during the second portion of the journey. You must exert control throughout this phase of the battle to decide the missiles' course. To evade bullets, try to move around a lot. You will start the last leg of the flight to the plant after defeating the adversary machines. To avoid running into the obstructions, use the left stick. Now, as the camera shifts perspectives, you must fight. The flying craft will grow in size. Shoot at the enemy's vulnerable spots while keeping them at a distance. If the adversary approaches too closely, use dodge. At the abandoned factory, the heroes will arrive. You'll be getting around on foot from now on.
A quick fight with the machines will teach you the fundamentals of combat before you face the first boss. Buzzsaw, a large saw that can cause massive damage with its melee strikes, will soon demolish the wall. Although it won't be difficult, you should keep in mind to avoid the enemy's strikes. If you can, lock the camera on the Buzzsaw so you can attack it more easily. To quickly empty Buzzsaw's health bar, use ranged assaults, such as strong laser attacks and regular attacks that have cooldowns. After you fight the mini-boss, 9S will show up. The second Android will play beside you the entire time and aid you in combat. Although you can't give 9S precise orders, you can affect his playing style. His natural approach is balanced, therefore it will be ideal. To adjust his style, speak with 9S. A new mission will be given to you to locate the Goliath-class enemy force. The system menu will also be unlocked by the game. You can examine the map, choose goods from your inventory, set active weapons, set installed chips, or explore intelligence data, although not all of its functions are yet available. Pay close attention to recovery goods, which allow you to heal after taking damage. To bring down the entire building and open the passageway, you must shoot the yellow higher fragment after the start of the following sequence. The ability to lock the camera on the target is available. Along the journey, be prepared to run into new hostile machines. Use ranged assaults to eliminate the flying foes. Additionally, you can leap in their direction and make a melee strike. Through the factory, there is a linear path. To gather treasure, interact with the glowing dots and open chests. Also keep in mind that you can either dodge or destroy projectiles that are coming your way. You won't be able to freely move the camera in some spots since the game will portray the action from the side. Keep in mind that you can jump over enemies and projectiles. Use the silo's entrance as depicted in the image and get ready for additional battles. Choose the hallway with a blue light above it when the combat is over. In one of the following locations, the game will change to a top-down perspective. Don't forget to aim your shot with the appropriate stick. Deal with the machines that are emerging from the containers in the region shown in the picture. Then, ascend the stairway by jumping onto the container. Later on, you'll run into bigger machines; attempt to avoid getting hit by them.
You'll reach a wide open area by following the straight path. You'll encounter two Buzzsaw machines if you attempt to cross the wide bridge. Although the machines don't possess any new abilities, you will need to be more careful when avoiding vertical and horizontal assaults because there are two of them. Utilize Pod's attacks with a focus. When the mini-bosses lose around half of their health, the battle will conclude.
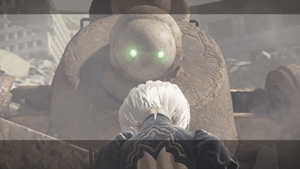
The main bad guy in the prologue is Goliath. When compared to the mini-bosses mentioned earlier, the combat with him will be lengthier and more difficult. Run away from where they will land or shoot them down because Goliath may fire missiles. Goliath frequently attacks with enormous saws resembling those of the mini-bosses. Goliath can crush you with a single saw-stab and both of his arms working together. You must stay away from these assaults. Another way to prevent being crushed is to stand in the middle, or between the saws. You can use melee weapons to go after the saws if you don't mind accepting an additional risk. You will weaken Goliath more quickly if you do this. Goliath occasionally launches rockets. The rockets will land in those red circles that start to form on the ground. Use sprint and dodges to quickly escape these areas. You'll encounter 9S while you're fighting. When the boss submerges under the sea, respond immediately. Start running away from the area were Goliath was, towards the bottom of the screen. The device will demolish a portion of the bridge as it emerges from the water. Up until a cut-scene is triggered, keep fighting. You'll need to start scaling the Goliath after seeing it. Run towards the direction of the TV on the little, curved balconies. Deal with the standard machinery along the route, and then go up the ladder. Watch the brief cutscene before taking on more common foes. Some of them can conceal themselves behind tiny shields; deal melee damage to them.
You will move on to the second phase of the battle with Goliath after the subsequent cutscene, where 2B will be wearing a flight suit. This indicates that the battle will occur in the air. Attack the boss while you are far away. The boss will mostly use potent horizontal area attacks during the second battle. You must climb higher to escape the move's range because it was anticipated. The boss has a powerful laser beam he can fire. This attack is poorly telegraphed and causes a lot of damage. Be prepared to avoid at any time. Being able to assault Goliath while he attempts to utilize this attack is made possible by the fact that the beam does not change its course noticeably. You cannot avoid the boss's limb strike, which will eventually cause him to throw you aside. You must begin to fly in the direction of the boss. Be ready to fend off projectile and laser strikes while in flight. The best strategy is to simply move around the screen and avoid frequently. The boss will lose a limb, which you can use to significantly weaken him. Ranged attacks are also an option, although they won't be as powerful.Continue the fight until Goliath runs out of health while avoiding the final laser assaults. Watch the movie trailer. You will arrive in the Bunker after that. A large space station circling aimlessly.
You should save the game for the first time after regaining control of 2B. Either a manual save or a rapid save are options. You will encounter 9S if you stay on the station's main corridor. During this chat, the game may recommend turning on Network Features. On the Social components page, we went into greater detail about them. Simply said, you can use them to locate other players' corpses in the world and get riches. We advise turning on the online option. You can change a number of settings at the system menu while also viewing an introduction to the game's events. Meeting with Commander is the mission's primary goal. To get to the command center, follow the designated path on the mini-map. Pay attention to the briefing. Once again, go the main corridor to the elevator that leads to the hangar. Turn right. The heroes will proceed toward the Flight Suits before returning to Earth.
Chapter 2
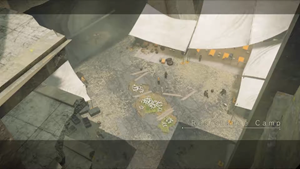
- Reach the City Ruins using Flight Suit.
- Head over to the City Ruins.
- Make your way to the Resistance Camp.
- Talk to the people of the Resistance Camp.
- Reach the Desert Zone.
Similar to the campaign prologue, Chapter 2 will start with you using the Flight Suit to take out foes as you soar. The new Missile Barrage mechanism is available here. It is useful for taking out clusters of adversary flying objects, but use it wisely since it has a cooldown like pod programs. When you arrive at the City Ruins landing area, the flight will come to an end.
You will arrive in City Ruins, a region of the open world, for the first time. Follow the larger indicator on the map, which goes to the Resistance Camp, if you only want to concentrate on the main plot. This is the new major mission objective. Alternately, you can start looking about the map right away, however you should be mindful that you can't access many places just yet. The Resistance Camp's access route is close to a tiny waterfall. You can explore the camp or speak with the rebel commander Anemone right away. Several NPCs in the Resistance Camp have been marked and you must interact with them to advance the plot and gain access to all of the shops in this area. Return to Anemone once the primary tasks have been completed, and she will give you a new main objective involving the investigation of shady machine behavior in the Desert Zone. Accept the task at hand. You will immediately make contact with the operator from the Bunker when you attempt to leave the camp.
Follow the map's instructions to find the route to the Desert Zone, which is at the other end of the City Ruins. You must pass by the slanted skyscrapers. You will encounter a new Supply Trader and Access Point on the route to the Desert Zone, but their offer isn't very noteworthy when compared to the one from the Resistance Camp.
Chapter 3
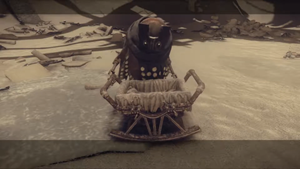
- Take down the Machines at the Desert Zone.
- Take on Adam.
- Escape from the area and return to the Resistance Camp.
You will travel from the City Ruins to the Desert Zone, and to do so, you must pass via the tight corridor that runs underneath the crooked towers. There are many sections in the desert zone, the first of which is relatively tiny. You will encounter additional machines while exploring the area, but you don't yet need to engage them in combat. To find Jackass, a member of the Resistance, you must finally jump to the rock shelf. Chat with this NPC. Use the game's designated passageway to access the widest section of the desert. The four places on the map that are denoted by red circles are where you must destroy hostile machines. To fully reveal the area of the desert on the main map, it is advised that you first unlock the nearby Access Points. You must proceed to the north route once you have destroyed all of the machines in the Desert Zone. The first time you notice a runaway machine, your main objective for the following five minutes will be to pursue it. You can access the subterranean Desert Housing by using the north passage. Approach it and begin by opening a fresh Access Point. The new position requires passing between the sunken buildings and is more linear. Start by looking for a structure that has an exterior staircase indicated on the image. Open the sizable chest that is there by ascending the stairs to the top. One of the numerous distinctive weapons buried in the game environment is a large Fang of the Twins axe, which you can locate inside. As a reminder, the Weapons tab of the system menu allows you to see and set newly discovered weapons as active.
You will encounter a number of tiny machines and a larger Goliath Biped as you continue on. Contrary to appearances, this machine is simply a bigger, more powerful version of the ordinary machines, not a boss. Continue on and begin pursuing the escaping machine once the conflict is over. Later, the viewpoint will change to a side view. Step back. You will arrive at a location where a machine will be close to a cradle. You will come under attack from a huge swarm of little machines. Get rid of all the machines to win a battle with them. Instead, you must struggle through a cutscene that also previews your battle with Adam, the new major boss. It can be difficult to fight Adam because he will progressively get stronger. Adam is quite frail when the combat first starts. You can engage him in close combat or assault him from a distance without fear of a powerful reprisal.
You need to get to the top hole during your escape, which was revealed after you defeated the boss. Run up there and approach it, then through the cave. You'll probably have to push a large chest for the first time during this sequence. Engage it and move it far enough so you can continue. The machines you come across along the route don't require you to engage in combat. When you are sufficiently removed from the boss battle arena, the Operator will start speaking with you. Return in the direction of the corridor that connects the Desert Zone with the City Ruins. The protagonists will opt to go back to the Resistance Camp. There, speak with Anemone. Along with the loot, you will also have access to your own chamber in the Resistance Camp. This is one of the ways to regain full health. You will also discover a bed there. When you try to leave the encampment, a chat with the Commander will begin, and you'll learn that the YoRHa squad's missing members can be found by searching the Amusement Park.
Chapter 4
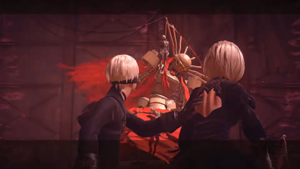
- Locate the missing YoRHa squad.
- Take down the Goliath Tank. (Optional)
- Ride the Rollercoaster and take down the enemies.
- Take on the Opera Singer Boss.
- Take on the Opera Singer Boss Second Phase.
- Head over to Machine Village.
This mission objective will become available to you once you've finished your first trip to the Desert Zone, namely after leaving the Resistance Camp and getting the Commander's orders. You must travel to a brand-new location close to the City Ruins in order to look for the missing team. You will come across a barricade and a sewer entry on your route to the mission's designated location on the map. Use it. A second ladder will soon be discovered, but look inside the nearby tunnel first before using it. It will take you to the third ladder, where you can climb all the way to the top to reach the hidden region that is seen in the attached photo. The most essential thing you can find in this location is Virtuous Dignity, another rare weapon.
Go back to the sewers and climb the second ladder you passed earlier. You can exit close to the Amusement Park's entrance if you follow it all the way to the top. You'll be exploring a sizable new area. Expect fights with masked foes once you enter the park. They shouldn't be too challenging, but be on the lookout for monsters that can fire powerful laser beams; take out these foes first and run to the side before the laser reaches you. Expect more battling as you proceed up the central staircase along the main walkway. Unfortunately, the main passage is blocked, so you'll need to find another route. Finally, you must approach the ferris wheel region and learn that the signal from the missing squad members originates from a nearby structure. There is also a fresh Access Point there. Two boss battles will soon be waiting for you, so it's worthwhile to save the game now. You must find a way over a fence that is blocking the access to the next site. Start leaping up and down along the ferris wheel seats. To avoid any mishaps, the camera should switch to a side perspective when performing the double jump. When you are in the last seat, lean left and sprint to the spot where the camera will reposition itself behind your back.
You will soon descend to the "arena," where the Tank will show up. It's crucial to understand that engaging in combat with the tank is optional since if you don't attack the machine yourself, it won't do so. However, because it will reward you with experience points and priceless loot, we advise taking out the tank.
Whether or not you engaged the tank in battle, you must continue. To get to the platform where the rollercoaster stopped, use the stairs. Get on any rollercoaster cart and begin the ride, during which you will have to battle certain foes. You'll encounter Opera Singer, the new main boss, right after the ride is over. When enough time has passed, the struggle will move on to its second phase. The boss will approach the stage, but you still have time to assault her before she arrives.
Start hitting her with strong hand-to-hand assaults and a Pod program after the boss is knocked to the ground. The goal is to inflict as much damage as you can on the Opera Singer before she picks up the fight again. The boss has the ability to jump in the final phase of the fight, sending shockwaves where she lands. Evade the waves by jumping twice or performing other maneuvers. Attack the Opera Singer as much as you can until she loses all of her health and falls.
Examine one of the defeated androids in the arena to discover that you are unable to assist them any longer. Leave the structure. A helpful machine will halt the characters in the main plaza and invite 2B and 9S to its community. Concur on a trip together. Begin to follow the machine along a lane in the amusement park. You must ascend the ladder in the photo. Start moving to the left after you reach the top. The viewpoint of the camera will change to a side view. Continue to move constantly to the left, jumping up and down to the upcoming shelves as you go. The Machine Village will finally come into view.
Chapter 5
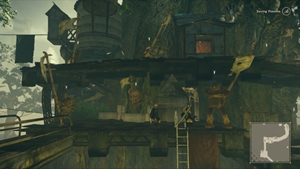
- Explore the Machine Village.
- Talk to Pascal.
- Deliver the Packages.
- Make your way to the City Ruins attack.
- Take on the Goliath Boss.
- Explore the Underwater Cave.
- Take on Adam and Eve.
This chapter will start when you arrive in the Machine Village and proceed in the direction of the helpful machine you met in the amusement park. When you arrive, speak with the Machine Lifeform, who will introduce itself as Pascal, the village's chief. Ladders are required to get from one level of the settlement to another as it has several. Check the mini-map as well because there are several locations where you can go from the main balconies and, for instance, investigate a branch with special loot or other chatty machines.
Meet Pascal once more in the Machine Village to carry on the main plot. Delivering Fuel Filter to the Resistance Camp will be required of you. It is important to note that the Machine Village has two main entrances, both of which are situated on the same level as the two traders and are visible in the region depicted in the picture. The right road will take you directly to the City Ruins, while the left one returns you to the Amusement Park. When you arrive at the Resistance Camp, give Anemone the Fuel Filter and take the Viscous Oil from her.
You'll hear about the attack on the city over the radio just after you give Pascal the viscous oil. When you get back to the City Ruins, a Goliath and a large invasion of enemy machines will be there. You will find out about the scheduled delivery of Flight Suits from the new radio transmission, and you need to show up at the delivery location. On your trip there, you can disregard the commonplace equipment and the Goliath. One of the buildings' roofs must be reached by climbing. You need to use the stairs and execute double leaps close to the huge ceiling holes.
The first phase of the battle with Goliath, which resembles the one with the enemy from the prologue who had the same name, will start once you get to the lower half of the roof. Attack the Goliath repeatedly until he loses all of his health. You will then be able to access the nearby roof, where the flight suits are, and go there. Engage the one designated for 2B. The second phase of the Goliath battle will take place in midair. If you get the chance, you can engage the monster in close battle as well as attacks from a distance.
After defeating Goliath, you'll be given a brand-new mission to look into the Flooded City. In the middle of the City Ruins, where a sort of crater has created, you will see a lot of destruction at the same moment; you must travel there to continue the plot. Your destination is the large hole in the crater, shown in the picture. Enter it and begin the slow fall. Utilize the torch to explore the tunnels and take out various mini-machines along the way. You will reach the spaceship via the sole passage that is open in the caves. There are two new bosses in this place, Adam and Eve. Even though you won't be able to defeat Eve in the end, the battle will still be brief and should end before the boss loses roughly half of her health. There will be an automatic new cutscene.
Chapter 6
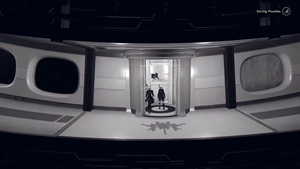
- Unlock Fast Travel and return to the Bunker.
- Head over to Pascal's Village.
- Cross the Forest.
- Arrive at Forest Castle.
- Defeat A2.
Leave the spaceship where the bosses were after the battle with Adam and Eve in chapter 5's climax, and head to the location where you earlier dove into the caves. On the way, pay attention to Operator 6O's announcement. Get to the location where Jackass will be waiting for you and where a new Access Point can be found. You'll discover how to enable quick travel. By interacting with Access Points and choosing the new Transport option, you can use it. Choose Bunker as your teleportation objective.
You need to speak with the Commander in the Bunker. You'll receive fresh orders. Go back to the Bunker's center and engage with a station that has an Access Point. You can read the most recent messages or choose the Transport option right away, choosing Pascal's Village as the final destination. Once there, speak with Pascal in the community. You will have a variety of dialog alternatives to pick from, and they are all worthwhile. You will learn about new, elusive machines from the Forest Zone.
You must visit the City Ruins' periphery in order to locate the path leading to the Forest. The simplest route is to approach Access Point station and select the nearest option, City Ruins: Near the Tower. To get to the overgrown shopping center, you must cross the drawbridge. While exploring the mall, you come across a blocked hallway. The characters will make a comment about it, and then a group of machines will show up. Take care of them. After winning the battle, a will see a cutscene in which the machine's head is rolling toward the blocked passage and detonating. You will then be able to proceed. You will soon arrive in the Forest Zone if you stick to the path. The castle, on the other side of the forest, is where you're going to end up. However, it is worthwhile to spend some time walking around the forest before you arrive. In this location, you can complete a number of side quests, unlock a new Access Point, and uncover a number of new, rare weapons that are hidden. To advance the main narrative, get to the bridge in the woodland indicated in the photo. The only unharmed bridge in the vicinity is this one. Take the castle-accessible mountain path. Once you get at the first place with castle walls and pillars, another bunch of machines will start attacking you. You can choose to ignore them or join in the battle, in which case you should employ white weaponry to weaken Goliath. Select a route that passes the castle by the broken sidewalls. You will come upon an access point along the route, and after navigating the machines, you can activate it. To explore the castle, descend to the main courtyard and move in that direction.
With a camera positioned from the side, the entire castle must be investigated. You may find it challenging to defend against certain opponents' strikes as a result. Use double jumps in addition to avoiding if necessary. It is generally safer to engage adversaries at a distance. Although there are side routes you can explore and loot boxes to be found, the main path through the castle is very straightforward and linear. You'll probably run into Linked-sphere Type machines for the first time in the game when you explore the castle. If they approach you, stay away from them directly and use the dodge when necessary. You can either ignore the first machine of this kind or use a lock-on to begin distant fire at its yellow core. The machine will be destroyed if his energy bar is depleted. Use the second ladder in the library's next chamber to climb over the missing portion of the floor and into the new passageway. You can jump down to a lower level at the area to push a huge box that is blocking the lower passage. As a result, you will discover Masamune the Forest Blacksmith, who can enhance your weapons to a maximum of level four. You'll find the second Access Point in the castle by using the upper left path. You're ready to confront the boss, so make sure to destroy the machines, open the Access Point, and save the game. Continue moving left. Attack the discovered machine groups from a distance and use pod programs to facilitate the battle.
When you arrive at the cradle in the end, Android A2 will materialize. Similar to one of the earlier battles, you must play this boss battle from the side. Go around the area before the conflict and try to revive the body of another player who has died so they can assist you. When A2's health is low, the battle ought to be over. The adversary will exit the arena by leaping of faith from the castle wall. Long jumps can be executed while running to the left, but don't forget to hold down the jump button to initiate the glide. Listen to the Commander's conversation when you return to the castle courtyard.
Chapter 7
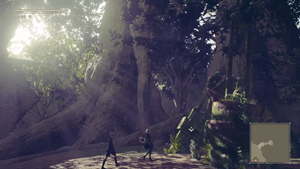
- Find and speak with Pascal.
- Head to the Resistance Camp.
- Head to the Flooded City.
- Take to battle using Flight Suit.
- Take on the Mini-Boss Goliath Flyer.
- Defeat the Grun Boss.
There is no need to use quick travel or go through the jungle again; your job is to get back to Machine Village. You can find friendly machines in the castle courtyard where you returned from. They'll throw open a big gate. You can get to your destination quickly thanks to the new shortcut. Speak with Pascal in the village and make the decision to send the data.
When you arrive to the Resistance Camp, listen to the radio conversation and then meet Anemone. The direction of this chat cannot be changed by you. Visit the location indicated on the map. The tunnel has just been unlocked, so you must investigate it. You can concentrate on the main goal or, if you'd like, you can explore the forks you cross and gather some little goodies. You will arrive in Flooded City via this route. You can find an Access Point nearby. In order to come back to this area of the map in the future after dealing with the machines, it is worthwhile to unlock it. You can also start or finish a few side missions in the Flooded City. You must get to the coast, which is designated as the next mission objective. Because they are unable to swim, the characters must avoid becoming wet. You will be revived at the shore if you do so, although your health bar will be slightly smaller. To get through larger water tanks, use double jumps, a dash while flying, or an ejection from the pod. Even though removing flying machines can make the travel simpler, you are not required to eliminate every machine you come across. You will observe a fresh dialogue with the Operator after you get at the appropriate location, and Flight Suits will then appear.
You won't experience anything unique on the initial flight. The machines that come on the screen must be destroyed, and you must avoid their aerial ranged attacks. Whenever a larger group of machines appears, fire rockets to more quickly weaken or destroy them. Beware of equipment that emits red lasers. First, getting rid of them is a smart idea.
At some point, you'll have to take out Goliath Flyer, a far bigger flying vehicle. Fire until Goliath Flyer is completely destroyed and bursts.
The battle against Grun, a gigantic colossus, is far bigger than the initial encounter with Goliath Flyer. You'll engage in a harder and lengthier battle with this enormous fish-shaped machine. The first few minor machines that will come should be dealt with to begin the battle. Unfortunately, similar adversaries will torment you for the majority of the battle, and you cannot ignore them. A cutscene featuring the defeated colossus exploding will be the result of your efforts. Finding out what happened to them will be the focus of the following game chapter. 2B will return to the coast, but 9S won't accompany her.
After dealing with Grun, you will enter Flooded City to start this chapter. You must return to Resistance Camp and go through the tunnel to the City Ruins because fast travel temporarily doesn't work at some stations (you can fix Access Points by approaching them). 2B will wake up on the shore alone, and your first task will be to get a scanner that can help search for the missing 9S. Speak with Anemone at the Resistance Camp before moving on to Ashes and Devola. Request the scanner from them. The scanner is an app for pods with the name A170: Scanner. The scanner needs to be made an active program by going to the Pod Programs tab on the system menu. At this point in the campaign, we advise having two pods unlocked so you won't have to forgo any offensive pod skills when selecting a scanner. You may find the Access Point for City Ruins: Cave by going back to the crater in the city's ruins. You can either get to the crater and jump into a sizable hole in the ground, or you can utilize the fast travel to teleport straight to the underground caves. While exploring the tunnels, head to the spaceship's entrance where you first encountered Adam and Eve. But this time, pick the previously disregarded correct route. You'll be directed to an elevator that wasn't previously accessible. You'll be able to enter the Copied City for the first time by using this elevator. You won't encounter any typical foes on the Copied City's area. Along with the regular riches, you can find other players' dead bodies. The primary road will take you to the spot where the boss, Adam, has 9S imprisoned, or you can concentrate on a full study of this area.
Adam won't begin fighting until he has finished his monologue. In order to get a temporary ally in the early stages of the battle, you can take advantage of this and raise the corpse of one of the defeated players.
You will see a cutscene with Adam's subsequent remarks before moving on to the second round of combat. The Boss now kneels and can launch an assault that summons vertical energy columns. You need move quickly and use sprint or dodge to avoid getting hurt.
A cutscene that features the 9S in captivity ushers in the third round of combat. Thankfully, you don't have to finish the battle right away. The boss' health points can be slowly drained. The boss will begin employing long-range strikes with powerful projectiles. If there is a chance that you might get struck, you can evade them by moving to the side. You are already aware of the remaining attacks. If the revived android has already fallen, don't forget to resuscitate another player's corpse. A cut-scene demonstrating Adam's defeat will play if his health bar is completely depleted.
As you get closer to 9S, a cutscene from a conversation with a friend will play. You'll be transferred to Resistance Camp.
Chapter 9
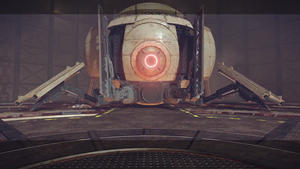
- Receive an email from Command.
- Meet Pascal at the Abandoned Factory.
- Escape from the Factory.
- Defeat the Mechanical Spider.
The conversation regarding the welfare of 9S with Anemone at the Resistance Camp opens the chapter. Read the message Commander: Trends Among the Machines by listening to the chat with the Commander and interacting with the Access Point. Await 2B's touch with Pascal to set up a meeting.
You presumably discovered the Factory: Entrance Access Point and unlocked the ability to fast travel there if you've already been to the Abandoned Factory. If not, you will need to locate the spot in the City Ruins shown in the screenshots above. You can double jump to get to the demolished bridge by first jumping onto the roof of the damaged truck. By going straight across the bridge, you may get to the plant. You presumably discovered the Factory: Entrance Access Point and unlocked the ability to fast travel there if you've already been to the Abandoned Factory. Follow the Priest, and they will direct the protagonists to an elevator that was previously inaccessible. When you get to the new floor, go right to where the prayers are said. The machines will eventually turn against the main characters once considerable time has passed.
Enemy machines surround you when you first start playing, and while you can take out the nearest ones, more enemies will constantly spawn to replace the ones you take out. Avoid being surrounded by a larger group so that you can maintain 2B's health even if you dodge. Wait until you hear the announcement that the elevator's entrance has been unlocked, then dash there while ignoring the other machines. You will then begin the arduous escape from the abandoned factory in this manner. The spider-shaped contraption will be hooked to the wall in the subsequent phase, and you can either rapidly continue fleeing or assault it up close. abide by the straight line. In due course, it will take you to a chamber with the following new Access Point, which you should unlock and save the game in, as you will shortly be facing a boss. To reach the large shaft where the mechanical spider monster will arrive, use the neighboring elevator.
You can continue your escape from the factory by getting to the new elevator before the boss is defeated. You can return to the spot where you first started exploring the Abandoned Factory by following the well-known balconies and passageways. After a short cutscene, you'll need to exit the building and receive the mission directive to travel back to the Resistance Camp.
Chapter 10
- Return to the Resistance Camp.
- Defeat the Mini-Boss.
- Eve
- Head to Pascal's Village.
- Phase One Eve Boss Fight.
- Phase Two Eve Boss Fight.
- Final Phase Eve Boss Fight.
- Ending A.
Once you've made it out of the Abandoned Factory, Route A's final chapter will start. At the factory's Access Point, you can save your game. Visit the Resistance Camp. You will receive a request for assistance, and since the access point at the safe home isn't working, you must travel there alone. Once you've made it out of the Abandoned Factory, Route A's final chapter will start. At the factory's Access Point, you can save your game. Visit the Resistance Camp. You will receive a request for assistance, and since the access point at the safe home isn't working, you must travel there alone.
A big machine will appear outside the camp, interrupting the talk with Anemone. Another artificial spider, this one. Since the spider can generate energy around itself and beat the ground with its legs to produce minor shock waves, attacking at a distance is the ideal tactic in this battle. Ranged fighting will help you survive in both situations. Eve will show up after the spider has been eliminated. You're about to engage in your first battle with this foe.
Eve will morph into a gigantic mechanical spinning ball. The safest course of action is to absolutely avoid direct contact and concentrate on hitting the boss from a distance in order to gradually knock more robots off the ball. You'll face off against Eve directly in the following round of combat. The boss can float and use clusters of bullets and crimson energy streams to attack from a distance. Keep utilizing ranged assaults. Another option is melee combat, which is riskier. Battle until the boss' health bar is completely empty. Eve won't be permanently vanquished, but you will be able to accomplish the following quest goal.
As soon as the radio call is made, proceed to Machine Village. Since you won't be able to use fast travel, you must instead approach Pascal's settlement from the side of the City Ruins. You will encounter a group of enemies at the barricade, and you must eliminate them all. Focus on avoiding the red energy streams as a mechanical centipede will participate in the battle and attack from the air. The simplest method is to lock the camera on its weak point and destroy it with your own ranged strikes. Following the victory in the battle, you will speak with Pascal and learn about Eve's present whereabouts. The center of the City Ruins is where you must go. Every battle along the road is voluntary. Once you get there, Eve's final fight with you will start.
The battle with Eve, Route A's final boss, will be significantly lengthier than the one at the start of Chapter 10 and will involve more detailed requirements. Try to keep your camera fixed on the boss during the fight because you might find it challenging to identify them on your own due to the small field of vision. You must continue to battle until Eve is enclosed in a sphere and has fully recovered his health bar. Unfortunately, there is no way to stop this. It is merely a battle tactic.
When the boss has been sufficiently worn down, a cinematic with 9S attacking will start, and you will move on to the last phase of the fight. In this phase of the battle, the boss will levitate and launch a barrage of projectiles at the enemy. You don't need to be particularly terrified of these attacks; just keep running to the sides and, if sprinting is ineffective, dash. 2B will sustain damage that cannot be avoided towards the very conclusion of the conflict. You won't be able to evade or engage in melee combat as a result. Stick to ranged assaults only, and try to position yourself in between the flying projectiles. Thankfully, the boss should already be considerably damaged, and it won't take long for him to lose all of his health for good. To finally take down the boss, approach the bowed Eve.
NieR Automata Route B
NieR Automata Chapters Navigation
Click to jump to a specific section of the page
Chapter 1
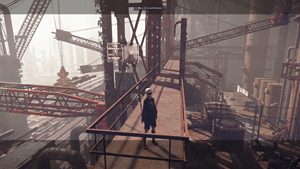
- Information of Route B.
- Prologue.
- Use the Flight Suit.
- Hack the Enemies.
- Defeat the Engels Boss.
- Rescue 9S.
- Head to the Bunker.
After you watch the end credits, create a save file as the game offers that will confirm your successes, that is, one that has ending A on the list of unlocked endings because you can only enter Route B after finishing the 10 chapters of Route A. You will now need to complete 10 more Chapters, however you will play as 9S in Route B and the events in some chapters are different. To continue, click Continue from the main menu, then load the save file where you finished Route A. You will participate in entirely new events in some chapters, while other chapters will only see small modifications.
The fact that you must initially manage a machine makes the Route B campaign's opening extremely odd. Try to revive the other machine as part of your task. Head to the other side of the starting area. Pick up one of the buckets you can see there. By standing over the area where the liquid is flowing, you can fill the bucket. Take the longer path home since you might have to replenish the bucket if the robot you are controlling rolls over after running into a minor impediment on the ground. To finish this section, you must carry a full bucket to the opposite robot.
The first time you play as the character known as 9S. At first, you'll work alone, but in later chapters, he'll team up with 2B, and 2B will then take on the role of the AI-controlled companion. Follow the directions on the mini-map to get to the Flight Suit to continue. To start the flight segment, interact with it. You can shoot both conventional projectiles and rockets while wearing the Flight Suit, and you can even dodge in midair, just as on Route A.
The four defensive system locations marked by icons will soon be updated in your mission objective, and you can visit them in any order. You will encounter machines, miniguns mounted on walls, and enormous red energy streams as you approach the systems. You'll discover hacking for the first time, which is 9S' special talent. By holding the Triangle button, you can hack specified equipment and hostile machines. When trying to hack into gadgets that are related to the current mission objective, the hacking game is a little different. The screen will resemble an obstacle course during these, and you will need to move swiftly to remove the black blocks in order to clear a path to the sphere at the conclusion of the "race" path. The dark sphere must be destroyed before time runs out. Plan your path a little bit ahead of time because some branches lead to dead ends. With the other three defense systems, follow the same method. Hacking each of them is best dealt with once you have disposed of the neighboring machines. The defense systems must be destroyed to start a new routine flight. You can now use hacking in all engagements, however you can still use the regular Flight Suit weapons if you choose. Finally, you will approach the cut-scene depicting the interaction with 2B near the Buzzsaw robots she defeated. You will need to accomplish one more flight through the hostile tunnels after hearing the discussion.
You can use the Flight Suit gear to fight the goliath from Route A, but we advise hacking the boss first. Place yourself where the triangle icon will appear. Your successful completion of each mini-game will reduce the boss' hit points significantly.
After 9S suffers significant damage, a brand-new unique part will start. Once more, you'll be in "virtual reality." You can get the secret ending F if you give up trying to save 9S and wait until the stipulated amount of time has passed. Sadly, you will then need to read the prologue again. If you want to save 9S, keep getting closer to the white squares while holding down the Triangle button to restart more of the android's systems. It takes roughly 40 seconds to finish this section, thus you only have three minutes to accomplish it. In order to destroy oncoming machines in the second part of this section, you must operate the pod itself. There shouldn't be any significant issues with that. Just try not to miss too often so that too many machines don't have enough time to spawn. You may concentrate on hacking machines while still defending 9S. This is a fantastic idea, because you will only need to accomplish the easier variants of the hacking mini-game here. Until the cutscene that shows the charge exploding and destroying the goliaths plays, defend yourself.
This chapter opens with a flight sequence in which the player dons the Flight Suit, just like in Route A. When you get to the City Ruins, you can choose to concentrate on your main goals or on the special exploration opportunities that 9S has. Finding and unlocking locked chests is possible using the aforementioned methods. They were inaccessible to 2B, but 9S can access them because to his hacking skills. The landing spot is where you can find the first locked chest (shown on the picture above). It has a special Phoenix Sword weapon within. More information on how to use 9S' special skills may be found on the Hacking page.
Finding Anemone is your first task in the Resistance Camp, much like it was on Route A. After meeting her, you have to speak with a few particular resistance fighters and once more do the quick tasks they offer you. The machines involved in quests should have more experience than their Route A equivalents. However, 9S is more powerful than 2B, thus the overall fighting difficulty should stay the same. You can look within the Resistance Camp for previously inaccessible chests. The one in the image is concealed in the Access Point's left-hand corner. ye.commastmastmastmastmastmas, and Anemone will bring you into the desert similarly to Route A. Your trip there is covered in Chapter 3.
The route to the desert is still in the same location (once again, it requires talking to Jackass). There shouldn't be any surprises while traveling through the desert itself. Try to keep in mind that it is possible to hack hostile machines. This new skill is very helpful when fighting large groups of adversaries because blowing up a hacked computer might weaken the adversaries nearby. You can explore the optional underground caves region in the first desert area. There is a lockable gate that can be opened with a hacksaw there. The distinctive Cruel Blood Oath weapon is one of the artifacts found in the recently opened area behind the barrier. You can also use the scanner in the location shown on the image in the largest portion of the desert. There you will locate a buried treasure in the form of a sparkling object. It's a special Phoenix Lance item. Similar to Route A, you must take out the machine groups in the main desert region before following the escaping machine to the Desert Housing section.
You will first encounter Route B's distinctive feature, additional cutscenes, when you get near the submerged apartment complex. They provide you a fresh viewpoint on previously known events and more information about the game's primary characters. Route A and Adam are reached by passing via the Desert Housing.
Similar to Path A, you must first battle ordinary machines before Adam joins the fray. Keep in mind that properly hacked machinery can explode, hurting the enemies nearby. Along with regular attacks, you can attempt to hack Adam while you are dueling him. The simplest method is to lock the camera on him and then hold down the Triangle button. If you attempt to hack Adam, you need to be aware that the mini-games will be harder. When 9S is regained under control, HP is lost if a minigame is lost. However, the benefit outweighs the danger. The boss can be quickly weakened by a successful hack. It goes without saying that you shouldn't expect to defeat Adam in a single hack, but each time you do, you'll suffer significant damage. The next key objective, the amusement park, is also unchanged from Route A, as is the escape from the Desert Housing complex and the journey back to the Resistance Camp. Said objective is part of Chapter 4.
Chapter 4
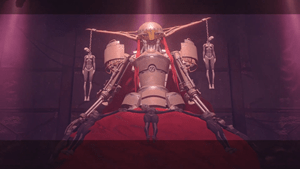
- Head to the Amuesment Park.
- Take on the Goliath Boss. (Optional)
- Take on Simone Boss.
- Speak with Pascal.
You must once more trek via the sewers to get from the City Ruins to the Amusement Park even if the Amusement Park Access Point you obtained in Route A is still accessible. While completing the same mission goals as in Route A, you can anticipate extra cutscenes, similar to those in prior chapters. after defeating the area's primary boss and arriving at the entrance of the Amusement Park.
You can once more engage in the optional battle against the enormous tank as you advance through Route B's adaptation of this chapter. Fighting the boss is advised because doing so nets the player both loot and experience points. The tank may be hacked to deal damage significantly more quickly. Only when the enormous machine is not currently moving in your way may hacking be tried. ye.commastmastmastmastmastmastmastmas, and Additionally, the hacking mini-games played during the boss battle will be more difficult. You can rely on standard attacks, but if you exclusively use hacking, you can take down the tank.
While traveling down Route A, you were unaware of Simone, the opera singer. The boss fight's opening phase is identical to that of Route A. During this stage of the conflict, it is difficult to hack the boss. You must depend on 9S' routine attacks or support from recently revived fallen teammates. Even if 9S is a hacker, just like in Route A, you still need to protect yourself from malicious hacking. Recall that the boss is the source of the initial hack. After that, her controlled dead androids will also be able to hack into 9S. An odd text cut-scene will start when Simone stumbles. An odd text cut-scene will start when Simone stumbles. There aren't any interactive components at all.
The player has the chance to pick up a new melee weapon on Route B. After removing the boss you must leave the stage chamber and investigate the main building's side corridor depicted on Picture 1. You can follow it to an elevator. Enter it, descend to the bottom level, and pass through. There is a lockable chest that you may unlock in the room with the on TVs. A special Demon's Cry weapon is present in IT. This location is noteworthy because it has a number of side missions that become available later in the campaign. Similar to Route A, Chapter 4 ends with you running into Pascal in the heart of the amusement park and pursuing her to the Machine Village.
Shortly like in the previous chapters, you may expect additional cut-scenes to play at specific moments in the game - the first such cut-scene will play just after you arrive in the Machine Village. The chapter itself follows the same format, thus after visiting the settlement of benevolent machines, you must assist when the machines invade the City Ruins.
Similar to Route A, two boss encounters are waiting for you in the City Ruins. The first is Engels the goliath, a gigantic machine that initially appeared in the campaign prologue. You can concentrate on regular assaults when facing the Goliath, but you can also hack the boss. It's interesting to note that the game frequently chooses the hacking mini-simpler game's variations, which you are more likely to win. This should serve as further motivation for you to employ this strategy and advance through the initial phase of the conflict with the goliath. Using the hacking option is still an option and encouraged throughout the second step, which involves the flight suit. Once again, completing the mini-games shouldn't give you any trouble.
Since you are in charge of 9S, you will battle Adam, while 2B will battle Eve. The good news is that Adam and Eve both experience the same assaults, so you shouldn't be concerned. The same boss powers might be anticipated. The viewpoint, which is from the side of the battle arena, is also unaltered. You can alter Adam in the game. The constrained combat area may make it rather difficult to begin hacking. Make sure to hack the boss when the battle begins. Try to start hacking in the subsequent round of combat while keeping as far away from Adam as you can so that he won't have time to effectively strike you.
You can reactivate the fast travel option after the chapter's conclusion, but you won't be able to choose the Access Points in the Forest Zone, Forest Castle, or Flooded City. These destinations must be unlocked in later chapters of Route B.
Chapter 6
- Check out the new Side Quests in Route B.
- Head to the Forest Zone.
- Head to the Forest Castle.
- Take on A2.
Seize the chance to go on side quests starting in Chapter 6. The Bunker is where you can start one of the first brand-new side missions that wasn't accessible throughout Route A. To obtain the goodies once more, you can replay a few of Route A's side tasks. Check out the chapter on side quests for further information.
You will need to accomplish the same quest goals to get to and explore the Forest Zone through Route A. However, you can anticipate brand-new cut-scenes that will show up at various points in the game and illustrate historical events like the moment the machine kingdom was created and its most significant occasions.
When you walk through the library for the second time, stop, spin around, and look at the top platform indicated in the above screenshot. This will allow you to witness new cut-scenes and give you the opportunity to find some special treasure that was not accessible during Route A. You can get there by jumping twice. When you get to the library's top floor, you can look around for the locked chest that needs 9S to hack it. You can get the special weapon known as Beastcurse by picking the chest's lock.
The good news is that you can use 9S' hacking ability, but owing to the constrained combat area, you must engage the hacking option while A2 is placed distant from the controlled character. The battle against A2 is quite similar to the encounter during Route A. If not, the adversary might have enough time to strike you and prevent your attempt to start hacking. Reviving a different player from the battle zone might be beneficial to boost your chances of successfully hacking in so they can divert A2.
Similar to Route A, you must first visit the Machine Village again before moving on to the Resistance Camp and eventually the Flooded City. The ability to fast travel to the neighborhood Access Point will become available in the game once you reach this place. One of the fresh cut-scenes will start playing along the route. You should take your time using the Flight Suit, just like Route A. To avoid having any side tasks from the notebook canceled when you start the largest battle of this chapter, try to finish them all first.
You must engage in air combat with a slightly more powerful Goliath Flyer machine against groups of normal machines in the opening engagements on the waterfront, which are identical to those on Route A. You'll have to engage Grun the colossus in combat once more. Sadly, you won't be allowed to employ hacking, so you'll have to conduct the battle in the "usual" manner by dodging the boss' energy streams, eliminating the small troops that keep popping up, and taking the necessary steps to destroy the yellow cores. Using the Flight Suit and destroying hostile flying objects, you must complete another flight sector. In the final stage of the battle, 9S will ride a big rocket that will start flying towards the colossus. You won't need to do anything in this section, just wait for the explosion.
Chapter 8
- Get through 9S's Memories.
Due to the events that take place at the conclusion of Chapter 7, Chapter 8 of Route B is a whole new chapter. You must go into 9S' memory with the goal of returning to reality while 2B is occupied trying to get to the Copied City. Although 9S' memory bank initially appears to be a maze, there is only ever one path that leads to the next location, so you don't need to be concerned about getting lost there. Stop at the white squares while exploring the virtual reality and hold down the hack button. This will start text-based scenes. There's no specific way to engage with them. yastmastmastmasticlericardsti a Continue reading the walls of text until you start to encounter vision distortion, then keep reaching subsequent white squares. The following cutscenes will play, during which you will learn that you have reached the location where 2B participated in the Adam boss fight on Route A.
Similar to Chapter 8, Chapter 9 appears entirely different when played as 9S. Thankfully, this chapter has a lot more interactions and interesting moments than the last one, which was really brief and linear. Starting in the Bunker, you must Self-Hack 9S. Stop close to the following Memory Systems, which are to the left and right of the main path, and hold the hacking button down. Apply the Visual System in the following row in the same manner. When you arrive at the server, utilize the interaction button once more. Behind the servers, a path will become visible, and you must proceed along it. In the next location, you will discover more interactive servers, but this time, you will need to play some straightforward mini-games with obstacle courses where you must reach the black balls. A fresh record will be added to the Archives for every tested server. When a server denies access, be prepared for a harsher minigame. As usual, in order to reveal the black ball's cover and destroy it, you must first eliminate the black enemy objects.
The process of studying 9S's mind will soon come to a close, and you'll head back to his subterranean chamber. Use the elevator to travel to the Terminal, and pay attention to the operator. To assist 2B, who is fighting in the abandoned factory, you must interact with the interactive station. Reach the new white square and hold the hacking button once you've entered virtual reality. You will now operate a factory machine via remote control for the first time. The first chance to swap to a more potent machine will present itself shortly after you begin touring the factory with the robot, and you should take advantage of it. You have to successfully complete the hacking mini-game each time, stand in front of the device you wish to take control of, hold down the interaction button, and choose the Remote Control option from the list. You won't have to worry about getting lost because the factory's tour is linear. You can continue moving on without participating in any of the fights that occur along the road. Keep an eye out for the crushers along the road; the first ones may be trickier to dodge due to the steam. You can just go to the spot where a lot of machines are fighting each other and get there right away. Be cautious when jumping to the subsequent broken balcony pieces in the vicinity of the silo. Later, you'll get a few chances to pilot some new, unusual machines, including some that fly. Once more, be on the lookout for crushers. Till you get at the location in the preceding picture, keep moving left. Hacking can be used to open the elevator for 2B.
You will return to virtual reality after speaking with 2B. There are two primary activity categories accessible in this order. You must first travel to the following Gates and start fighting there, plainly destroying the black ball. To open a new gate for 2B after each victory, hold the Triangle while standing on the white square. You will participate in an attack on the plant mainframe right before the end. The missiles in the following level of the hacking mini-game will arrive in waves that resemble spinning turbines. To prevent connecting with any of the bullets and restarting the entire battle, try to stay between them. Of course, eliminating all of the black balls that are in the center of the battle area is the final objective. You will witness a scene depicting 2B's victory and the conclusion of this chapter if you succeed in the hacking mini-game.
Chapter 10
- Return to the City Ruins and protect 2B.
- Eve Boss fight First Phase.
- Eve Boss Fight Final Phase.
- Ending B.
Again, you'll start this chapter in the Bunker, then meet the Commander in the space station's main hallway and discover some crucial information regarding the moon base. The alarm will sound when you get back to 9S' cabin. Utilize the Flight Suit to go to the hangar. You will have to battle the Goliath Flyer mini-boss once more as you fly towards the landing place in the City Ruins. Utilizing hacking is an additional convenience that will hasten the end of this battle. In the ruins, you'll finally meet up with 2B.
You have the option of hacking the machinery around the boss, while you can also concentrate on normal techniques of assaulting, in the first fight against Eve in Route B. The following actions in this chapter are also the same as in Route A; you must travel to the adjacent Pascal's village, get rid of the machines there, and then wait for information regarding Eve's whereabouts.
The opening phase of the combat with Eve is comparable to the battle in Route A because it takes place in the same area and the monster employs the same attacks. Eve hacking is a choice that should be made if you have enough time to successfully launch the attack without running the risk of the boss interrupting it. The hacking mini-game will be played in its most challenging iterations during which, among other additions, you will need to refrain from touching the orange bricks. Even though it will take more time, you can use regular fighting techniques to defeat Eve if you can't manage the mini-game. The Eve fight's second phase brings a crucial new component. As part of the plot, 9S decides to hack Eve, and when you press the hack button, you won't play the typical hacking mini-game; instead, you'll spend a significant amount of time in virtual reality. Your battle will begin when Eve's avatar appears. Try to move to the flanks frequently during this combat to avoid being hit by clusters of projectiles. At the same time, use every opportunity to hit Eve. You'll be able to move on after winning the initial conflict. Expect more clashes similar to this. These always take place in a small area and require you to strike Eve's avatar while dodging bullets. The next two areas have labyrinths that require you to clear the passage by destroying the black blocks. The good thing is that you may proceed at your own time and don't have to race through them in order to find the exit. You will reach the location of the house via a long vertical corridor. You will return to the traditional battle with Eve in the City Ruins after more cutscenes have finished playing in this area. Similar to Route A, you should concentrate on dodging groups of missiles fired by the monster during the third phase of your battle with Eve. Dashing and sprinting to the sides will be advantageous in this situation. Naturally, you must continue attacking Eve at the same time, and 9S will once more be able to employ the hacking option. The characters won't be able to dodge when Eve causes an explosion. To reduce Eve's (the boss') remaining health bar to zero, try to dodge the flying projectiles and keep attacking her from a distance.
The primary ending of Route B, which you just finished, will be shown in the game as ending B.
NieR Automata Route C
NieR Automata Chapters Navigation
Click to jump to a specific section of the page
Chapter 11

- General Information
- Weaken the Enemy Systems.
- Fights in the City.
- Head to the Bunker.
- Escape from the Bunker.
- Get 2B to the Mall.
- Get 9S to the Mall.
- Choose your next playable character.
Only after finishing Route B's 10 chapters, or those in which you played as 9S and repeated the campaign's main half, can you access Route C and Route D. Create a save file with all of your progress after watching the closing credits, specifically one that has ending B on the list of achievements that have been unlocked. From the main menu, select Continue, and then select the save file with completed Route B. You can think of Routes C and D as the second half of the campaign because they contain whole fresh content. You will play them simultaneously, which means you will do actions that will eventually reveal the C and D endings. Fortunately, you don't need to take great care while making crucial decisions because the game's conclusion is only determined at that point. In addition, if you acquire Chapter Select, you can quickly view the chapter that you first missed. It is nevertheless worthwhile to frequently save so that you may quickly obtain different, shorter endings. Three playable characters which are 2B, 9S, and A2 must be switched amongst as you progress through this content. You can complete the chapters pertaining to 9S and A2 out of sequence, but you must ultimately go through the entirety of the main plot. The subsection title in our guide contains information about the playable characters for each chapter.
As 2B in battle gear, you begin at Bunker. To control the Flight Suit and begin flying, proceed to the hangar. The action will now shift to 9S, and you'll have to undermine the defenses of the opposition. You can investigate the six red circles that are connected to the mission objective in any order that they appear on the map. You need to get to the highest position at each site inside the red circle. For instance, this may be the topmost platform of the defeated Goliath, a building's roof, or a radio tower's upper balcony. You will find one machine in each of the marked sites. Just hack the machines instead of destroying them. Simpler hacking mini-games will typically appear. Fortunately, you can try again even if you lose the mini-game. Go to the red circle that will appear next to the bridge between the City Ruins and the Abandoned Factory when all the machines have been compromised. When you arrive, a cut-scene will appear. You will use the Flight Suit and take back control of 2B. Watch out for energy beam-shooting equipment in especially when fighting. Keep yourself between the beams and take out these adversary troops first.
You can visit the three marks on the map in any order. You will come across a sizable number of machines in each of the three places, and you can use any of 2B's primary attacks and Pod programs to take them out. You might be hearing rumors that additional YoRHa soldiers have perished in the interim. You don't need to worry about that because the mission won't be a failure. You'll get a message from the Operator after you've won every battle begging you to help the Omega Squad. You must visit the area of the city next to the factory bridge to complete this. Here, combat the machines until a cutscene appears. It will thereafter change to 9S. Jump off the bridge and resume your battle. The opponent will conceal itself with camouflage to avoid detection. At initially, you can still hack them, but after that, both hacking and evades are forbidden. Attack continuously until a new cutscene appears. Use hacking on the 2B who is kneeling after the bouts and finish a short hacking game. You will come under attack from YoRHa team members who have been afflicted with the virus. The local system will prevent you from attacking them directly, but you can hack them instead. To play the hacking mini-game, you must navigate a maze within a set amount of time. It will thereafter change to 9S. Jump off the bridge and resume your battle. The opponent will conceal itself with camouflage to avoid detection. At initially, you can still hack them, but after that, both hacking and evades are forbidden. Attack continuously until a new cutscene appears. Use hacking on the 2B who is kneeling after the bouts and finish a short hacking game. You will come under attack from YoRHa team members who have been afflicted with the virus. The local system will prevent you from attacking them directly, but you can hack them instead. To play the hacking mini-game, you must navigate a maze within a set amount of time.
You'll be playing 2B when you awaken in her bedroom. Speak with the Commander in the Command Center.
You will need to start leaving the Bunker after the nearby androids have been infected. Fight the infected YoRHa members first. Area assaults and robust Pod programs should function effectively in this situation. The station will enter an emergency when you have dealt with the enemies. re-enter the elevator. The left route will be blocked as you enter the station's main corridor, therefore you will need to take the right. Along the journey, prepare to battle other corrupted androids. The elevator that leads to the hangar is your aim. To start a brand-new, crucial cutscene, get close to the flight suits. The flight suit-clad androids that will appear on screen when you're in the air. They use constant fire rather than single, powerful shots, so you should fly around the entire scree to get away from them. It is already known how this sequence will end: 2B will sustain damage and make an emergency landing in the Flooded City.
We advise using the route around the City Ruins that is seen in the illustration. By doing so, you will avoid a sizable crater in the center of the ruins. You could get into a lot of difficulty there because your speed is limited, especially if you run into a Goliath who can severely obstruct 2B's progress. Even if you pick the alternative route, you won't need to be concerned about running out of time. In general, you should move without ascending or making further jumps along pretty stable ground. Aim for the drawbridge that spans the gap between the ruins and the shopping center. Image distortion will grow along the route, but keep going. 90 percent or more of the population should be infected after crossing the drawbridge. You'll see a cutscene depicting your meeting with A2 and first-person control of A2 when you get close to the entrance to the deserted mall. In order to advance, defeat the YoRHa team and then approach 2B with A2.
You can take control of 9S once you've seen the cutscenes. The same place in front of the mall is where you must go. Any route through the city is possible, and using any fighting machines along the way is optional.
You get to pick the following chapter after witnessing the brand-new significant sequences. You can either choose A2 or 9S to play as. It's crucial that this decision doesn't have unavoidable ramifications. To get to Chapter 17 for Routes C and D, you must ultimately complete all of A2's chapters and all of 9S's chapters. The decision being discussed simply pertains to choosing who you wish to play first.
Chapter 12

- Take out the machines in the Desert Zone.
- Take on the Boss Hegel.
- Check the Sequence in A2's Memory.
- Select the next chapter.
Listen to the talk with the Pod once A2 has awakened. Soon after taking control of A2, you will be given the first mission goal. Choose the Desert Center Access Point as your quick travel location to get to the machines, which are in the greatest area of the Desert Zone. You need to defeat a number of Goliaths. By default, aim to take down these robots one at a time. However, if you observe a swarm of approaching missiles, you should also flee from your current foe. You must defeat the Goliaths before the boss shows up.
The boss battle can be challenging and unpleasant because the boss's strikes can come swiftly and one after the other, making it impossible for you to respond with your own assaults. Always try to flee the area as soon as you are hit by an energy stream to avoid taking additional damage from subsequent hits. Hegel occasionally separates into solitary spheres that land in various locations on the beach. The spheres have the ability to fire powerful energy beams that can not only deal significant damage but also throw A2 off balance and leave her open to more strikes. To avoid the beams coming from the now under assault sphere and other ones nearby, try to jump to the sides a lot. Repeat all of the aforementioned steps up until the cutscene where the spheres surround A2 starts to play. The monster has a high level of resistance overall, thus it may take you many minutes to defeat him.
You'll step into a virtual world. Start exploring the following locations, where you must play the typical hacking mini-games. You must destroy the black objects to uncover the black balls and to gain entrance to the following area by doing so. The chapter will soon come to an end as you get at the location where the cutscene will play.
Like Chapter 11, make a choice if you want to support A2 or 9S.
After selecting the option to Support 9S in Chapter 11, you can first access Chapter 13. Alternately, you can play as 9S later after finishing the additional chapters focused on A2. Whatever option you select, you cannot skip the new 9S-focused stages. You'll begin in the Resistance Camp, where Dovola and Popola will welcome you. Outside of the rebel hideaway is where you may find the first mission goal. Above the City Ruins, the tower will materialize. Approach it and attempt to hack at its root. 3 little Sub-units will start to appear. Try hacking one of them to discover that you must locate the 3 keys needed for each unit. The Forest Zone is where you can find the first key.
You can use a variety of techniques, including fast travel, to get to the woodland. Head down the slope to the enormous building known as the Resource Recovery Unit. Locate the entrance at the Recovery Unit's base. The Meat Box inscription over the entrance will be read out by the pod before you can enter. Keep in mind to utilize the pod flashlight to brighten the tower's darker rooms as needed. Chests with loot may be found when investigating the mechanical framework, and many of them will hold expensive goods like premium chips. You'll find battles with machines on practically every floor of the Meat Box skyscraper. These battles aren't particularly fierce, though, and you can eliminate your foes even more quickly by hacking. Reviving dead gamers will turn them against your character, so avoid doing it. The elevator that leads to the next floor can be accessed after taking out each group of hostile machines. Unfortunately, you can't finish all the floors at once since you have to get out of the elevator and participate in the battle on each succeeding floor. It is worthwhile to use the option to lock your camera on the opponents during one of the dark battles so that your ranged strikes have no chance of missing. Additionally, you can keep using hacking to simplify things. Be prepared to battle a mini-goliath as well. You can hack it effectively to weaken it or launch a distant attack. With the yellow core, you must ascend to the top floor. The last opponent must be defeated before you approach it. You will see a cutscene and get the Forest Access Key. The cut-scene showing the defeated machine marks the conclusion of the chapter.
You will be able top make a choice again between monitoring A2 or 9S.
Chapter 14
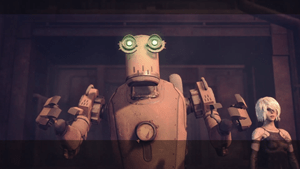
- Replace the Fuel Filter.
- Tend to the Quests of the Villagers.
- Tend to the Problems in Machine Village.
- Take out the infected Machines.
- Take on the Engels Boss.
- Choose Pascal's fate.
- Select the next Chapter.
The chapter opens in the same desert where A2 and the boss Hegel engaged in combat in Chapter 12. You will be informed that the fuel filter has to be replaced, and your new mission will be to locate someone who can assist. Resistance Camp is a place Pod recommends you visit, and you can get there quickly. The game status should be saved. Reach the marker at the camp's entrance and assist Pascal in eliminating the adversaries. Speak with Pascal after the fight. You'll be given the option to either leave Pascal alive or kill him in the game. Enter the rebel hideaway and have two conversations with Anemone. By the way, from here you can gain access to the suppliers. You can take advantage of the chance to begin fresh side missions in the Resistance Camp or just head over to Pascal's Village. You cannot fast travel in this game, so head towards the barricade outside the city's ruins. Pascal will teach you what component is required to make the filter. Pascal's location is in the Forest Zone, therefore you can use fact travel in this instance. When exploring the forest, keep an eye out for neighborhood machines, which, among other things, could try to startle you by leaping out of the bushes. Fortunately, they don't offer much of a threat, so you can keep going without having to engage them in battle. Look behind the glowing loot at the foot of the large tree when you get to the red circle. You must obtain Rigid Tree Bark and use it to Pascal. Fuel filter will be given to you.
A2 will offer to assist in eliminating the device abusing the village's youngsters as a token of appreciation for developing the gasoline filter. A brief quest called Vanquish the Bad Bot will be given to you. It was covered in Chapter Side Missions on the page Machine Village. With Storage Element I Play With Us! side missions, you can keep assisting the machines. You must agree to deliver the book from Anemone to the Outdoor Machine when you meet with them in the village. To obtain Book: Pensees and Gold Ore, visit the Resistance Camp and speak with Anemone. There is a very brief Pascal-related cutscene. You will hear a radio message after taking back control of A2 that will inform you that the machine village is under danger. Use this chance to save your game progress. Respond to the call, then move approach the barrier blocking access to the Machine Village. When you arrive, you'll see that the machines are fighting, and Pascal is available for conversation. The machines have turned on the peaceful villagers, and Pascal will give you permission to assault them. There are mechanical worms flying around the settlement in addition to the ground-fighting devices, which can be attacked in any method. In order to properly attack the flying adversary, it is best to lock the camera and the sight on the yellow center of the target. Check all of the village's levels using ladders as certain machines are on the lower level. After the battle, you can learn about the retreat of the remaining machines to the shuttered plant by listening to Pascal's message. To go to the abandoned factory, use fast travel. Make your way to the entryway to meet Pascal after saving your game status.
In the factory room, new infected machines will start to arrive. Attack them right away. Outside the plant, more hostile machines will start to materialize. It would be a good idea to turn on the Berserk mode or use the area programs of the pod in order to deal with a lot of rather weak opponents. The Goliath Tank will eventually join the conflict. You should aim to destroy the tank's mounted weapons in order to prevent it from firing at you, just like in other tank encounters from earlier chapters. Berserk mode is another option, once more. After the battle, a cutscene showing the giant goliaths arriving will start, and you'll be given control of one of them.
The enormous Goliath will be in your control as Pascal, and you can look for opportunities to destroy the incoming enemy flying planes by using furious strikes and upper-limb swings. You'll soon witness a scene in which the adversary Goliath Engels makes an appearance. In order to stop the boss from utilizing the same strike from the beginning of the boss fight, try attacking first. Once you see that Engels was able to land the assault, you can also block opponent punches. Continue to undermine Engels so that they lose pieces of their massive armor and eventually succumb.
Pascal will continue to be under your control when you get back to the workplace. Go back to the production room to find a horrifying realization. Play as A2 once more and speak to Pascal. You'll be asked by Pascal to remove his memories. Choose the bottom-level dialog option (Right... Do it). It's a wiser decision. because if you select this alternative, Pascal will let you buy a special Machine Heads weapon in Chapter 15. In a straightforward variation of the mini-hacking game, destroying black balls is the process for erasing the machine's memory.
When playing as 9S, if you haven't yet completed the new levels, the game will once more show the selection window; make sure to select the 9S option to join them. If not, the campaign will instantly go on to the next phase.
Chapter 15
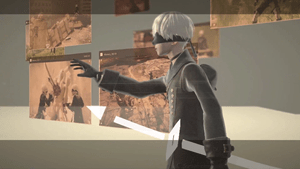
- Acquire the key from the Flooded City.
- Defeat the Virtual Reality mini-boss.
- Heal in the Resistance Camp.
The woodland is where the chapter will start. In Chapter 13, 9S looked into the first design of the Recovery Unit at this point. You will investigate the second item from this group in the aforementioned chapter, but first you must travel to Flooded City. With the aid of a swift journey, you can reach there with ease. On the shore is a new resource recovery unit called Soul Box. Use the doorway at the base of it. You can do a lot of hacking at Soul Box. Once you get to the closed box, the first hacking mini-game will begin. Note that there is no time limit on the mini-game. From a distance, try to destroy any hostile objects. Keep in mind that some shooting objects can only be damaged from behind during the mini-final game's stage. Try to quickly circle them before they decide to turn around. Destroy the purple missile-firing objects as well, especially since destroying these missiles will not stop them. Use the elevator to ascend to higher floors, just like in the tower from Chapter 13. Only one story up is reachable in each scenario. There are numerous boxes in Soul Box that provide extremely valuable goodies. Among other things, high-quality 6 chips to assist you in completing the campaign. Faith's special weapon is also among the crates. It goes without saying that you will have to play a harder version of the hacking mini-game for each locked box you manage to open. Remember that you don't need to hurry, just as previously. Destroy the orange bullets while avoiding the purple ones. Additionally, avoid the orange blocks because they hurt everything that touches them. You can keep rising if you successfully hack closed boxes, and you'll also be able to collect useful items and open up new archives. You must get to the top floor of Soul Box. A yellow core can be seen there. None of the adversaries are directly guarding this item. After employing core hacking, you'll enter virtual reality and, rather than commanding an arrow-shaped item, take charge of a 9S that is "virtual" and has all the abilities of the real world. Go directly to the "old friend's" meeting location at first.
Rely on hacking to reduce the enemy's health during this combat. Unfortunately, the hacking-related minigames won't be simple, but you can try again if you fail. Also, keep in mind to avoid any potential player corpses because they will not only not aid in your triumph but will also turn against 9S. You can obtain the Ocean Access Key by eliminating the mini-boss.
The POD will notify you of the damage you sustained and the loss of some of 9S's powers when you get back to Flooded City. So you must go back to Resistance Camp. You can use fast travel at the access point in Flooded City, eliminating the need to travel via tunnels. Devol and Popol will treat 9S in the Resistance Camp. You'll have access to all skills once more, and you may start working on getting the third and final key.
After finishing chapters 13 (9s) and 14, you will begin this chapter (A2). Initially, you will assume control of 9S. You need to investigate the third and final Recovery Unit object. After the start of the struggle in Resistance Camp you must head to Amusement Park. Using quick travel will, of course, allow you to cut your journey short. The location of the Resource Recovery Unit called God Box is where you previously visited the Amusement Park's main building in earlier chapters. Take the exit at the base of it. Action shifts to A2 once 9S joins the Recovery Unit. There are no special tasks required of this character. You must go to the amusement park's Resource Recovery Unit. Explore the tower once you have control of 9S once more. It will suddenly get dark and you'll be attacked by machines in the first room. You can utilize POD's flashlight, but it is simpler to turn the camera away from adversaries so that you can attack them more successfully. Hacking is also available in this skirmish and in subsequent ones, although it is not worthwhile to waste time using it to defeat simple foes. Go to the elevator after the altercation. Another conflict will start on the new level. To properly strike flying foes, keep in mind to focus the camera on their yellow cores. Regular machines perched atop the boxes can be attacked from a distance or up close and personal by leaping toward them. More battles await you on the following floor, and once more you can select between ranged and melee combat. To prevent larger opponents from firing a lot of missiles, focus your attacks on them. Run across the bare ground. Once you exit the elevator, you will arrive at Operator 21O, where you will discover that it is infested with a virus and that you must battle the boss.
The boss will fire numerous missiles while surrounding himself with shifting rings. Fortunately, you can shoot down the missiles, albeit they may cause you to lose focus on your primary objectives. Lock the camera on the yellow ring cores and start shooting at them right away if the difficulty level permits it. Increase precision by using the Laser program and other tools. The fascinating thing is that you can attempt to hack the cores. However, if there are too many missiles heading your way, this could be problematic. Both techniques have the potential to reduce the boss's defense. Red lasers will be fired by the rings. You have to jump over them at the appropriate time to prevent getting wounded. Continue firing the yellow cores at the rings as much as you can. After the rings are destroyed, the duel will move on to its second phase. Operator 21O can be taken out directly in this phase of the fight using both melee and ranged assaults. Because the boss will target direct attacks with melee weapons, ranged attacks are more secure. Boss hacking is also permitted, although naturally, you'll have to play the more challenging hacking mini-game variations. Continue attacking and hacking to gradually deprive the Operator 21O of more energy points until the boss is defeated. The action shifts to Area 2, where you must combat with Auguste, the second boss.
You will take part in this battle as A2. The Boss utilizes variously useful balls. Auguste primarily use the balls as upper limbs; the boss can revolve around its own axis, attempt to crush A2, or use the limbs to strike A2. The balls could separate from Auguste's body and endanger A2. Bosses can levitate or bounce off the arena, depending on the type of assault they use. Then, you can try to go as far away from the boss as you can or try to run between the balls while searching for opportunities to make efficient melee strikes. It is recommended to use area attacks to simultaneously try to kill them and weaken the monster because small machines can enter the battle. You will soon recover control of 9S and be in the center of the amusement park if you continue fighting until the boss loses all life and a cutscene starts. Wait until you receive the third and final Park Access Key after paying attention to POD's advice. You can now go to chapter 17, which is the last one.
Chapter 17
- Find out how to open the Tower.
- Explore the Tower.
- Battle the 2B copies.
- Explore the tower more.
- Ko-Shi Boss fight with A2.
- Ro-Shi boss fight with 9S.
- Battle both Ko-Shi and Ro-Shi.
You can go back to the Tower in the City Ruins once you have located three keys in Chapters 13, 15, and 16. The Sub-units surrounding the Tower must be opened with the keys. You'll have to break into the sub-unit each time you utilize a key. You must navigate a maze in the hacking mini-game to get to a black orb or numerous black orbs. Due to the adversaries, the mini-game depicted in the image above may be challenging. Try to avoid destroying the black blocks that serve as a barrier between you and the opposing units as you move through the course. By doing this, you can avoid having to restart the mini-game due to their attacks. You should save your game before moving on to the Tower itself after you've managed to split it into three Sub-units. Your initial effort to hack the Tower will be unsuccessful. The procedure is quite slow, and you'll start to experience machine attacks that prevent you from hacking. Focus on combating the machines rather than attempting to hack the Tower. The adversaries you kill will be replaced by new ones, so you won't be able to eliminate them all. You need to be patient till Devola and Popola's twins show up. While you hack the Tower, they will help you. You must stand in front of the tower and hack it in order for the story to continue. On the battlefield, new machines keep popping up, but since they'll be occupied fighting Devola and Popola, they shouldn't trouble you. It goes without saying that you must first complete a hacking mini-game before the tower will open. Utilize the fact that the mini-game, strangely, has no time restriction. Move slowly upwards and use care when taking out foes. Always stand between an orb's shots or in front of an orange projectile that can be shot down when fighting an orb. The orbs will be shielded by force fields in the final location. Nothing needs to be done by you. Watch for a cutscene featuring the twins and 9S. The goal of the game is to deepen your understanding of Devola and Popola's backstories by presenting you with Data Records about them. There are just text-based options in this scene, and they don't significantly alter the situation.
The Tower has a straight passage within. Expect to come across sick YoRHa units, which can be killed in open combat, but it's safer to hack them or engage them at a distance. Look around for treasure along the path, such as shining objects and chests (some of them need to be hacked open). You can get a ton of priceless loot and fresh entries for the Archives in this manner. There are hostile 2B models in one of the rooms that you must defeat. It is advisable to use your pod's offensive programs at a distance during this conflict. If you try to engage them in melee combat, the enemy can very easily encircle you. You would have to deftly dodge their strikes because 2B Copies are persistent in battle. There are hostile 2B models in one of the rooms that you must defeat. It is advisable to use your pod's offensive programs at a distance during this conflict. If you try to engage them in melee combat, the enemy can very easily encircle you. You would have to deftly dodge their strikes because 2B Copies are persistent in battle.
You'll handle A2 after dealing with 2B duplicates and seeing a cutscene. She must get to the Tower as well, although she needn't necessary face off against any foes. You'll run into Devola at the entrance to the Tower, where you can converse to her one last time. The Tower's inside has the same hallways as 9S, but you can also find new stuff there. You will arrive at the library. You must look around on both floors of this building. You can approach "glowing" bookcases, explore first-floor chambers, and gather common stuff. A hacking skill for A2 can be unlocked by looking at the first bookcase. New hacking mini-games will start to appear now. As usual, they might entail discovering black orbs, or they might entail damaging tall objects. Once you've finished each mini-game in the Library, you'll receive a new Archives entry as your reward. On the bottom floor, there will be one final bookcase. Get close to it to start a cutscene. Holding the Triangle button will launch the mini-game, where you'll learn about the necessity of autohealing in order to stop the virus. Your control will once more switch to 9S. You must destroy the black objects in the mini-game that are situated on either side of the main road. To avoid getting hit, always remember to fire down orange projectiles. Once you've healed yourself, gather the loot nearby and move on. Two holograms will appear, and then shortly after, machines will begin to assault. Prioritize fighting the adversaries who can shoot a lot of shots at once. You shouldn't have too much issue winning this battle if you rely on routine attacks and hacking. You will receive a YoRHa Disposal Archives entry with an interesting entry as payment for winning the battle. You will come across some YoRHa units wearing flight suits as you continue on. Hacking is strongly advised in this encounter to take out those incredibly resilient foes. Run sideways and dodge a lot because attackers have access to strong red energy beams. You can also hurt enemy nearby by detonating hacked units. Approach one of the Flight Suits and board it when all enemies have been vanquished.
Your control will now alternate between 9S and A2 at random intervals. Separate boss battles are required for each of the protagonists. A2 fights Ko-Shi while 9S fights Ro-Shi. The following lists the strategies for 9S and A2. You'll probably switch characters frequently during the boss battles. Every time, you have to keep going up against the boss of the controlled protagonist. You may expect 9S and A2 to vanquish their adversaries at roughly the same moment because the confrontations are somewhat choreographed and dramatic. But this is not the end of the story. After they unite, you'll have to defeat the bosses once again.
The tactics for 9S and A2 are listed here. During the boss fights, you'll probably switch characters frequently. You have to keep fighting the controlled protagonist's boss each time. The battles are quite spectacular and scripted, so you might expect 9S and A2 to defeat their enemies at around the same time. But the narrative is not over yet. You'll have to defeat the bosses again after they come together. The game alternately switches your control between A2 and 9S during this battle. Use the special talents of the protagonist who is currently playable since you can't change this. Thanks to A2's Berserk Mode, the bosses can be hacked as 9S and damaged more quickly. Although they aren't particularly difficult in their combined form, you should be cautious when they electrify because it makes them temporarily stronger. In addition, they have the ability to rotate while electrified. Keeping your distance and employing ranged strikes is your best course of action in this scenario. Focus on evading to minimize damage if you are unable to escape in time. You will have to decide how to go after dealing with Ko-Shi and Ro-Shi in order to determine how the game will end.
You must select A2 for the campaign's last playthrough if you want to see this ending. This is the second choice, and you must also affirm your decision. By siding with A2, 9S will take over as the game's final boss. You have two options for attacking 9S: up close or from a distance. Be ready to duck regularly because the boss uses ranged strikes. While controlling A2, you might try to engage the berserk mode, albeit it might be challenging because the 9S is a quick foe and typically stays away from close quarters. A dome that can slow down and restrict motions can be made by 9S. Try to avoid the area where it will appear by moving. Focus on leaving the dome as soon as you can if it's too late for that. Additionally, 9S might try to hack A2. To avoid getting hurt, you must successfully complete the mini-hacking game each time. You should aim to jump over the shock wave that is produced by one of the 9S strikes' more uncommon attacks. You must finish another cyberspace scene after 9S loses his entire health bar. Fighting is not a part of it. The sole route that may be taken must simply be followed, with several stairways placed along the way. The "exit" from the above image leads to a longer stairway. The C ending and final credits will be visible in the game.

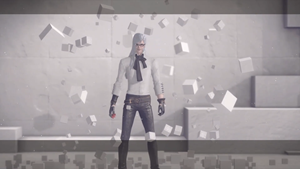
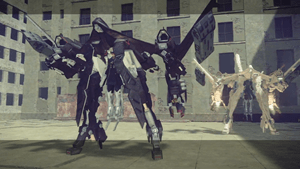
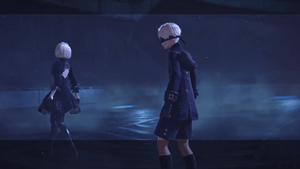
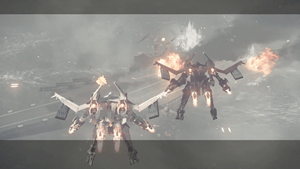

Whha
30
+14
-1